
How to start your own ceramic studio from scratch
Things I wish I knew before I started my own ceramics studio.
A year ago my pottery journey started and in that year I learned so much! I wish I knew some things I know now, especially when it comes to starting a studio from scratch.
(THESE PICTURES ARE FROM OUR THE STUDIO IN AMSTERDAM, FOR UPDATED PICTURES GO TO THE NEW BLOGPOST: A GLIMPSE INSIDE MY POTTERY HOME STUDIO)
Potters wheel
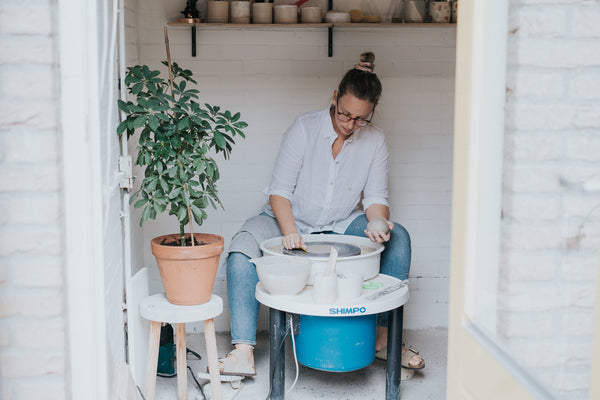
The first thing you will need for your own studio, if you want to throw, is obviously a potters wheel. The first wheel I bought was a brand new one, it was the Shimpo RK 5t. It is around €600. This is a very good wheel for beginners, but I wish I saved some more money to buy a bigger and more stable wheel. It’s all about weight when it comes to wheels. The Shimpo RK 5t is a tabletop wheel and not very heavy. As I said it is a good one for beginners, but after a couple of months I outgrown the wheel and needed something heavier and more stable.
I started looking around for a second-hand wheel and I found one that was not too expensive and not too old. I’m talking about the Shimpo RK55, it can hold up 12 KG of clay and feels very stable. Centering is much more easy on this wheel. For now, this is a perfect wheel for me and I am really happy that I made the change.
So I would definitely recommend, if you are serious about pottery, to invest in a good and strong wheel. Just look at your budget, maybe save some more money or try to buy it second hand, that will save you a lot of money.
Kiln
I think for me buying a kiln was the most terrifying object to buy, because I didn’t knew anything about kilns and what to look for. So here are the things that I wish I knew before I bought one.
There are generally said 3 different types of kilns; gas, wood and electric kilns. And some others, buy these are the 3 most common ones. Most potters who have a studio at home use a electric kiln. They're comparatively inexpensive and small ones can plug directly into a 120-Volt wall socket, making them accessible to ‘small’ pottery operations. My kiln is 50 liters and each time I fill it I am suprised by how much can fit in.
My (second hand) kiln came with a computer which you can set up with different firing schedules. This works very good, although it is also neccessary to use withness cones to see if the firing reached a certain temperature. These pyrometric cones bend at specific temperatures, so that you can check if your kiln reached that temperature. Sometimes glazes can look different than how it is supposed to look, so if you want to know what happened you can check your cones to see what temperature your kiln reached. There is so much to learn about this, if you want to learn more about it, buy some books about pottery or go online!

Studio set up
Now that we talked about wheels and kilns, it is time to talk about all the other stuff you need for your own studio. My studio is in our back garden and it is tiny, but it works! Ofcourse it would be awesome to have a bigger studio, but it is free and it is like a tiny house; I made the space work for me. The thing I love most about it is all the shelving. I have so much space to keep everything organised, which is very important for me!
Others things to have in your own studio are lots of buckets, small and big ones. I use the smaller ones for when I’m throwing or glazing (keep them seperate, to avoid glaze in your clay water and vice versa). I use tree big buckets filled with water. One is to clean everything (tools, sponges etc), one is for the throwing water and the other one is the one with all the reclaim clay. I love that we can recycle the clay and this system helps me to to that.

Reclaiming
To reclaim the clay, I would totally recommened you to buy some plaster. I bought mine in my ceramic supplier store, it is 50cm by 50 cm and works perfectly. I use a paint mixer (on my drill) to mix the reclaim clay and put it on the plaster. If the plaster is totally dry, it takes about 2 days for it to dry. Wedge it about 100 times and your good to go with your reclaimed clay! There are some good YouTube video’s on this topic, I learned a lot from these.
Although I am not a big fan of plastic, this is actually a very good material to use in the studio. When a piece is trimmed, the best way to keep it moist is by rapping it in plastic. I bought a pack of plastic bags a year ago and I still use them. Sometimes they can get very dirty, but I rinse them and just use them again! Nothing is thrown away in my studio.
A little recap of all of the above:
- I would go for a second hand wheel, not a table top version, but the real deal if you are serious about ceramics. It might take a while before you can buy something, because potter wheels are very popular on second handwebsite like Marktplaats (in Holland).
- Go for a kiln with a computer, this is so much more easy especially if you have no experience.
- Use withness cones to check if your kiln reached a specific temperature.
- If your studio is small, try to use the space as clever as possible and try to come up a plan that works best for you.
- Buy lots of buckets, a plaster board will be your best friend for wedging and reclaiming and try to reclaim as much as possible!
Have fun in your new studio! If you have any questions about something at all, shoot me an e-mail and I will get right back to ya!
X Robin